Showing posts with label DIY. Show all posts

20141021

So Spooky So Kitty Guts

For Halloween this year I'm going to be a Hello Kitty fanatic - like a stalker, wanna kill and stuff you add to my collection (just for halloween though)! My local fabric store has the cutest selection of Hello Kitty fleece at the moment. Every time I go in for supplies I have to go visit the HK section and pat it all and stare for a while... (stalker face).


More this way...

20140918

DIY: Plushie Heart Earrings

Expect more DIY's from now on - I really enjoyed making these earrings and tutorial for you! I got the inspiration from Bubbles Tokyo and I had all my leftover heart cutouts from my backpacks too. I don't like to waste after all!

With these bad boys, you can have endless cuddles when you're out an about or opt for a quick snooze on the bus, they are so super cushy and soft!!

I hope you guys try it, it was super easy and probably took me 20 mins if I wasn't filming the whole process. Please let me know how you go and what you would like to see more in the future!


20131226

DIY: Crop Halters from Old T Shirts

Have a bunch of cool old T shirts you only ever wear to bed these days? Being a reformed T shirt collector I had a stash with super cool graphics but they were a horrible fit and some had just seen better days. With the weather heating up, on this side of the world, I initiated a salvage operation...

Here's what I came up with, an easy way to revamp those forgotten tees for summer in just 6 easy steps. Watch my video below and be sure to let me know how you go :). I'm sure there are plenty of awesome childhood tees that haven't seen the light and I'd love to see them!


More after the break!

20131018

Halloweener

It's my favourite time of year again! HALLOWEEN! So what's a girl to do??? On a budget - the usual; stock up on dark eyeshadows to create a skeleton look or stick to tradition and rock little red riding hood... been there done that! So inhibitions (money matters) aside, what look would you create this halloween using your most lusted after pieces!?

I've daydreamed up a few things for y'all, and noted a few handy tips for when you're actually putting some of these together for realsies (budget friendly)...


1. Cyber Mermaid


mermaid

KTZ dress, Betsey Johnson earrings, Mario Salvucci devil fish necklace, Guerlain meteorites pearls, Essie nail polish, Chanel pearl conch clutch, Alexander McQueen shoes

Seapunk, cyberpunk, whatever the hell punk, that pearlescent is the answer. It's all about the glistening highlighted skin, coloured eyes that match your outfit and messy braided hair. Think body con or pencil skirts ladies (such as a cute bustier with this sequin number), we need to recreate that silhouette! Throw in a few statement pieces to really hone in on the fact that you rose up out of the water in a space ship submarine.

2. Vampy Vampire


vamp

Lover valentine mini dress, leather bra Etsy, Jadechiu Black Phoenix ring, Mara ring, Alexander McQueen embellished leather gloves, Marc Jacobs gold fox stole, Chanel rouge allure lipstick, Scarecrow shredders vampire fangs, Louis Vuitton patent leather cancan thigh high boots, Kissing fly phoenix ear cuff, Christopher Esber dress

Dark smouldering eyes and red vampy lips that don't quite close on your special FX fangs is key. Gnarly intimidating jewels suggest you ate a couple of dudes for breakfast, ripped out their skulls/spines for the molten metal you now wear on your dainty fingers. Vampires are kind of victorian right? Lace and boots like that really support claims you've been around for centuries...

3. Furby Raver


furby
Unif furby sweater, Topshop knitted fluffy sweater, Topshop fluffy peltmet skirt, Unif Moody shades, Fleet Ilya cat ears, furby pencil case, jeremy scott shoes, limecrime lipstick

You probably have a few furry rave things lying about, if not pop into your local fabric shop and acquire the brightest most offensive or baby pastel combination of furs and cover your chosen toe-teasers, sew a crop top and skirt ensemble. Don't forget some frames and attempt an anime eye for those high on life LCD lights.


4. Ghetto Barbie


barbie
Kiko Mizuhara in Nasir Mazhar, barbie bella two toned contacts, sretsis crop, asos lace socks, etsy denim jacket, vera wang princess, fashion union pink mini, luv aj necklace

You can simply go for Kiko's Nasir Mazhar outfit because it's just perfection or if you're just an everyday jo blow like myself, opt for lots of pink, a girly circle skirt and a cute lacey crop. Pair it with a pimped out jacket and barbie accessories! Barbie thinks she's perfect and I guess she is, so she loves wearing things out with her own face on them.

5. Corpse Bride


corpse bride


Miu Miu boots, Pamela love silver pentagram ring and cross earrings, Chanel eyeshadow palete, Manic Panic goth white makeup, bunch of black dead roses Amazon, Sretsis dress, fake blood makeup

Sretsis's AW 2013 is so perfect for Halloween, from the day of the dead to the bone collector with their capes and dark dresses, the options are endless! This particular dress is so gothic, corpse bride. Up the witchy glamour with dark hollowed eyes and black lips (you were poisoned to death, sorry), dark jewels, ghostly white skin and fake blooooooooood (said hauntingly).

Whatever you end up doing, have a good one and please do share!


         \\                \\                \\
    .-'```^```'-.     .-'```^```'-.     .-'```^```'-.
   /   /\ __ /\  \   /   (\ __ /)  \   /   /) __ (\  \
   |   ^^ \/ ^^  |   |    ` \/ `   |   |   ^  \/  ^  |
   \   \_.__._/  /   \    \____/   /   \    `'=='`   /
    `'-.......-'`     `'-.......-'`     `'-.......-'`

20130909

DIY: Fleecy Set

Okay I'm addicted to iMovie! So here's another short DIY tutorial viddy for a cropped sweater and skirt ensemble. I was walking through Spotlight the other day and came across this awesome unicorn fleece material, obviously too dangerous to be children's sleepwear :O...sorry kids.

It's heating up in Aus but for those of you who are on the flip side, perfect timing to get some warm comfy stuff together. For fellow soon-to-be beach bunnies, you can even choose a lighter type of material for this project (you can do whatever you like)! Quite the versatile trans - seasonal pattern I feel ;p. Enjoy!


luv aj necklace, tokyo bopper shoes, topshop socks, bag DIY here

Just as a note I got about:

  • 1.5m of material
  • 0.5m of ribbing
  • 1m elastic

This was just enough and allowed room for mistakes and redos! *But it all depends on the width of the material you choose as well. I also decided to keep the warning message, DO NOT USE FOR CHILDREN'S SLEEPWEAR, I reckon it makes it. I will also be careful around flames and thangs, okay, yes. I'll never get over ponies...


Anyway, I hope you have a crack at it, I'd love to see how it turns out for you! :)

20130901

DIY: Furry Heart Bag

Woo! Amongst the many hours I spent on Borderlands, GTA and most recently training to be the most basic Mortal Kombat fighter (I suck so bad) I made another drawstring bag. It's fluffy this time and has a plastic heart in the middle so everyone can see your things. I've also done a video on how I made it - hope it's okay for my first one :D.

I've also been thinking about new things to make so if you've seen something cool and have any suggestions, feel free to leave a comment!


Top and skirt from Tokyo (Shibuya 109), shoes by Tokyo Bopper, Joyrich socks.

That's it from me...happy crafting!


I make them too if you can't be bothered! :p pht.storenvy.com

20130825

DIY: Riri Zip Skirt

I have always drooled over Rihanna for River Island's first collection, so this DIY is to never getting around to buying any, (it was ALWAYS sold out when I was in Japan or shipping rates were through the roof). There's something so alluring about that staple, effortless simplicity, not to mention how darn sexy all of it was. This probably took me less than a few hours to whip up and costed about $20, just because zips are exy these days.


STEP BY STEP DIY AFTER THE BREAK!


20130810

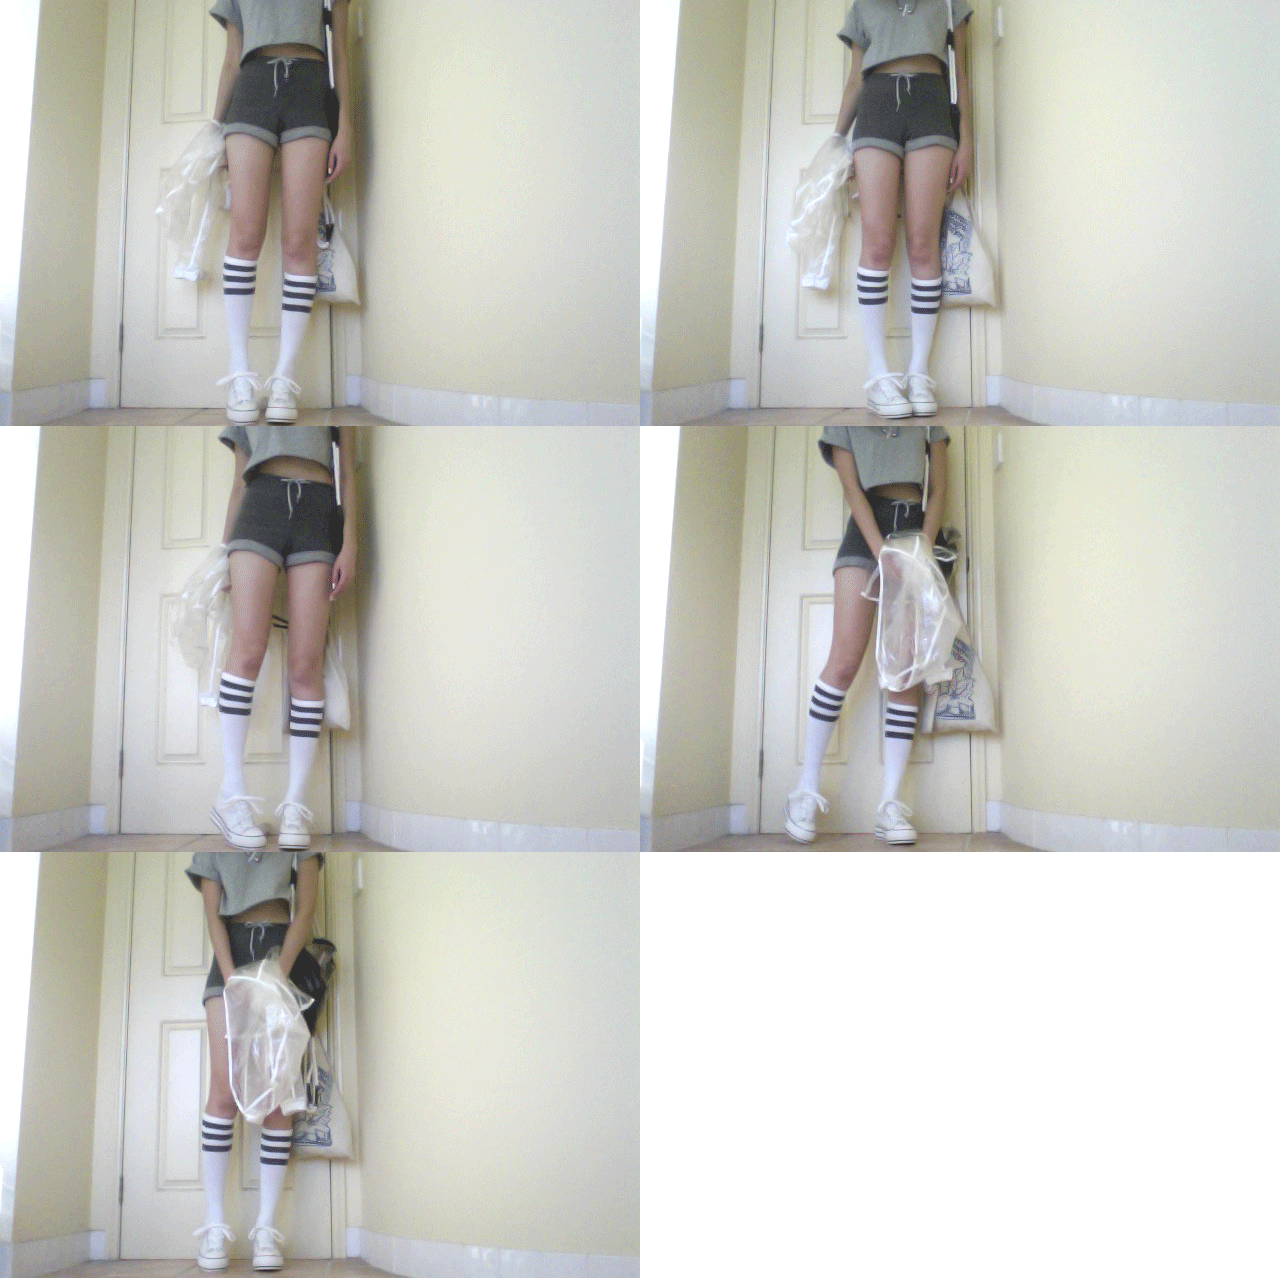
DIY: Clear Drawstring Backpack

Excuse the thumbnails while I upgrade my cam, my 4 year old pro is getting jealous of my iphone 5. I've been getting back into sewing lately and made this clear bag from leftover materials and a bit of drawstring. It's super easy and I hope you like it!


Topshop cropped shirt, bershka sports clear jacket, american apparel shorts and socks, necklace gift from naked label, wedge sneakers.

To make the bag, I followed this youtube video but made the straps doubly long (for an adequate adult fit that doesn't strangle the armpits) and just added the plastic section in the middle of the bag. Instead of two pieces for the bag I had 2 X top sections for the bag which you sew over for the drawstring, 2 X plastic sections in the middle and one large piece for the base. I ended up adding some casings for the drawstrings for that extra detail! 


I've been also thinking about making fur ones, fully clear ones, vinyl ones, with different thickness/coloured drawstring, possibilities are endless! Good luck and tell me how you go...

20130611

DIY: Kawaii Clear Clutch

Remember collecting stickers (from morning glory, those of you who live in Brisbane) and having them all in a sticker book you can show off? Once again, you can revisit your childhood with this super easy DIY! Duh, I know everyone of you out there are more than capable of running wild with a bunch of stickers and a clear bag of your choice. But to save you from a few oh shit, shouldn't have done that moments, here are a few handy tips!


I got my bag off etsy; they have all sorts of styles and sizes! Stickers are from anywhere from markets to department stores and stationary shops.


First off, clean your bag/surface you wish you stick the crap out of! Nothing worse than getting fluff or hair caught under your stickers and you end up having trailing strands of hair (unless that's what you want) or snapped off bits sticking out all over the place.


Collect all the stickers you want to have on your bag BEFORE you start sticking things down. I had to peel ones off to make room for the new cool 3D ones I ended up getting.


If you want some kind of symmetry for a more organised look then use a measuring tape/ruler to decide where the center of your bag is (if you have a feature sticker) or to help you divide your working space into quarters.


Home stretch! Like Purikura, the more the better, fill out every gap for that overkill kawaii look...


And you're done. Fill that up! Click here for a super cute tutorial by The Milk Club on how to style a clear bag!


20121118

Kernel

A few weekends ago I decided to stay in with Daria the complete season, bleach kit, whole bunch of dyes and plenty of hair treatment! I've always stayed away from bleaching my hair myself but fueled by the confidence that a ton of youtube videos gave me, I dove right in. Originally, I wanted silver ends but settled for multicoloured then gradually lilac ends instead. Things went wrong but worked out in the end and I didn't loose half my hair or nothing! Also, I lied, I'm not over coloured hair.


topshop butterfly lace body, dr denim jeans, clear rain booties (from the goods blog), xray bag from etsy

It's been a week now and my hair has finally started to recover a little bit after doing treatments every time I washed my hair. Because the ends of my hair had undergone bleaching, colouring and plenty of processing I knew it would be a bit of a risk for a home job. I had been obsessing over silver hair so I decided to give it a go. The next bit is pretty boring, me blabbing on about how I did it and how it went, based on a bit of research and personal opinion so if you're interested please do read on!

I started by bleaching my hair twice using Manic Panic Flash Lightning 30 vol, for 45 mins the first time then 20 mins the second time, smearing it in with gloved hands and using a brush where I can. This was the scary part I always feared, my hair went stretchy (as in when you get one strand and pulled on it it doubled in length, but didn't snap), I stopped at this point and calmly saturated the shit out of my ends with Kerastase damaged and brittle hair rinse and did a moisture treatment straight after that! At that point it did get to a very pale shade of blond with golden and green hints in it and after I dried it, the hair seemed okay. I wasn't wimping out now!

I heard that colouring right after bleaching is good to restore some strength in your hair by imitating or rebuilding some of that protein so I went ahead and toned it with Manic Panic's Virgin Snow (apparently it's a semi permanent colour like any other manic panic pot rather than toners that say, wella make). Some parts went really white:


Still rather green, I made my own toner using a tiny bit of Fudge Paintbox Blueberry Hill, some paintbox paler shade of white (I like virgin snow better, it works better for me and doesn't dry out my hair like this does) and tons of argan oil conditioner. To tone green down you use a purple toner, so I left it in for ten minutes. The goldy green green faded alot and turned a few parts greyish. I ended up leaving this mixture on for longer because I liked the lilac and pink tinges (as blueberry hill is a red based purple rather than blue) it was leaving. It was all multicoloured the first few days before I washed my hair (because the tops of my head is a darker shade of purple, the colour rinses down and blends it in gradually):


Good idea to save a bit of this concoction for when you need to redo the ends if the brassy colours/green creeps back in!

I didn't really have a clear idea of what I would end up and I have super fine hair so I wouldn't say that my hair is that resilient but I'm glad I had this little experience and my hair is also getting back to decent health after all that! Plenty of keratin, ceramide and moisture treatments afterwards as well as good old olive oil in wet hair works a dream. Salons will definitely take better care of you and good ones definitely know what they're doing but I mean I have had my hair snap each time I brushed it after going to a good salon the first couple of times I bleached and coloured my hair. Fallout after doing it myself hasn't been more than the usual, I guess I'm glad it all worked out despite the patchy less than perfect job and I just want more purple in my wardrobe to match! Hope I have explained the process okay, not recommending this for the faint hearted but if you're strapped for cash and need a medium-level project on your hands, it's hair in the end, so have fun do it if you really want to!

Got any tips for me? Favourite treatments, serums, hair savers, drop me a line!

20110113

Thought I was there


choker from etsy, top (vintage mum), diy beavis and butthead studded shorts, studded creepers
Slowdive made me feel so sad last night.
Watched the news all night.
It's going to take forever to clean up.